Setting up your Emberpulse unit using the iOS App
Print
Modified on: Wed, 4 Nov, 2020 at 2:19 PM
Emberpulse Unit Setup
- Plug in your Emberpulse unit
- Download the Emberpulse app from the App Store
- Follow the on-screen instructions to complete the setup process
Screen Image | Action Required |
 | - Enter in your Emberpulse username or the email address associated with your Emberpulse account
- Enter in your Emberpulse account password
|
 | - Press Let's Start to continue
|
 | - View the back of your Emberpulse unit and note down the last 8 characters of the MAC and CODE
- Enter in the MAC details in the MAC field
- Enter in the CODE details in the CODE field
- Press next in the top right hand corner to continue
|
 | - Press the button displaying your Wi-Fi network name to continue
|
 | - Enter in your home Wi-Fi password details
|
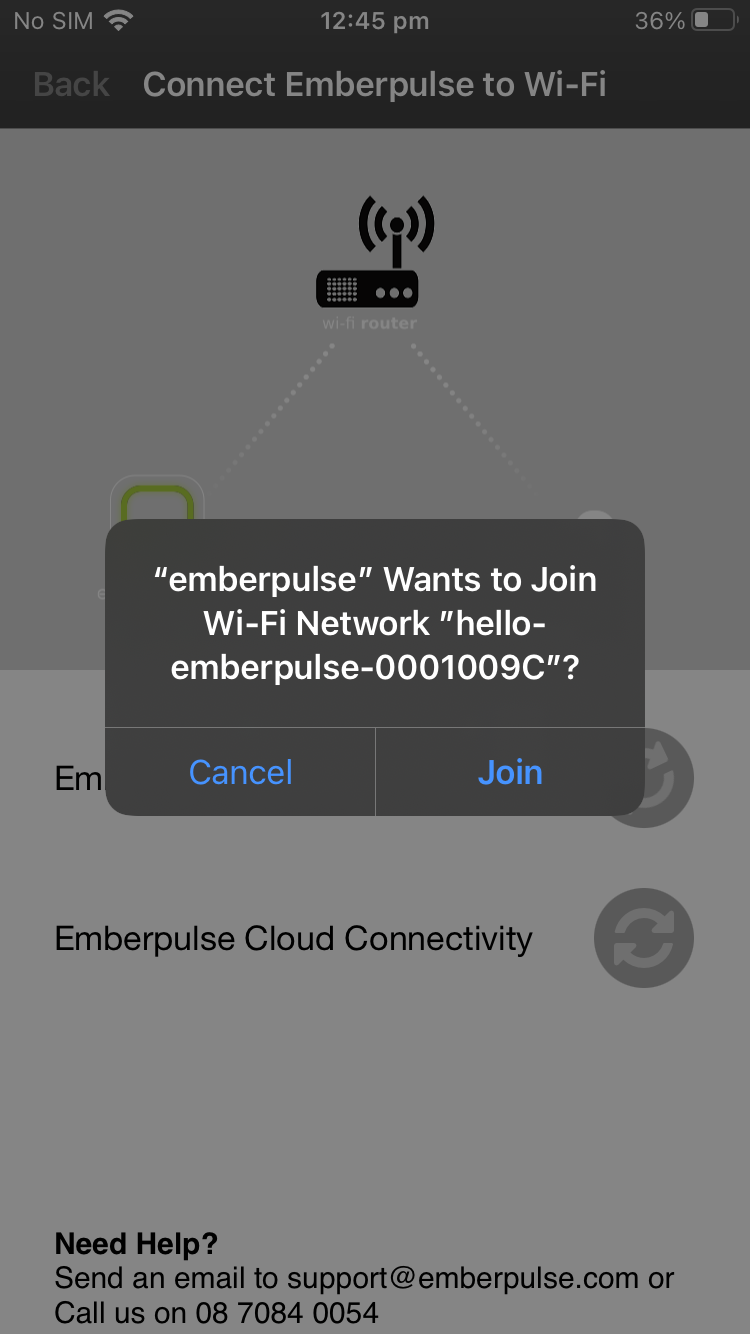 | - You will be asked to join network "hello-emberpulse-XXXXXXXX" where XXXXXXXX are the last 8 characters of the MAC that you noted down earlier
|
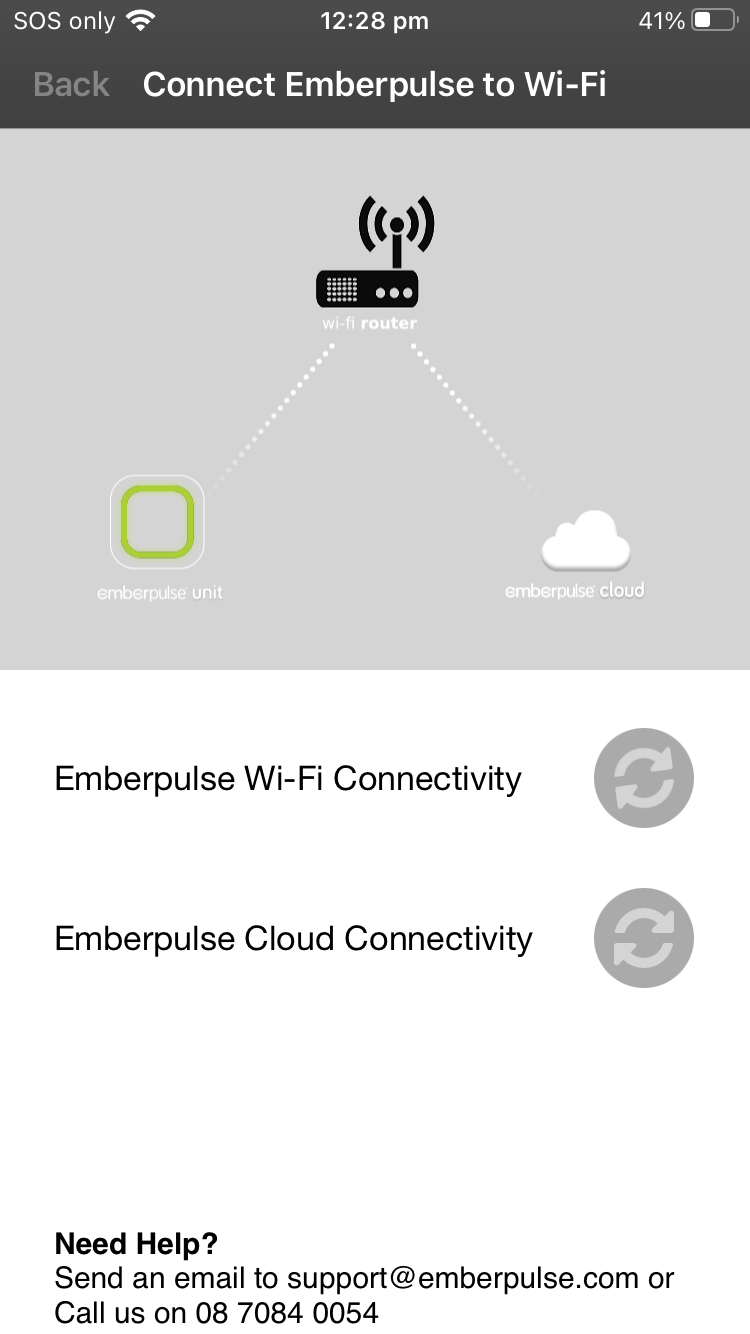 | - This screen will display the status of the connection process
- No action is required on this screen
- When there is a tick next to Emberpulse Wi-Fi Connectivity, the light on your Emberpulse unit should be flashing magenta (purple).
- When there is a tick next to Emberpulse Cloud Connectivity, the light on your Emberpulse unit should be a solid orange.
|
 | - Your Emberpulse unit has successfully connected to your home Wi-Fi
|
 | - Press on + Add Meter to connect your Embermeter(s) to your account
|
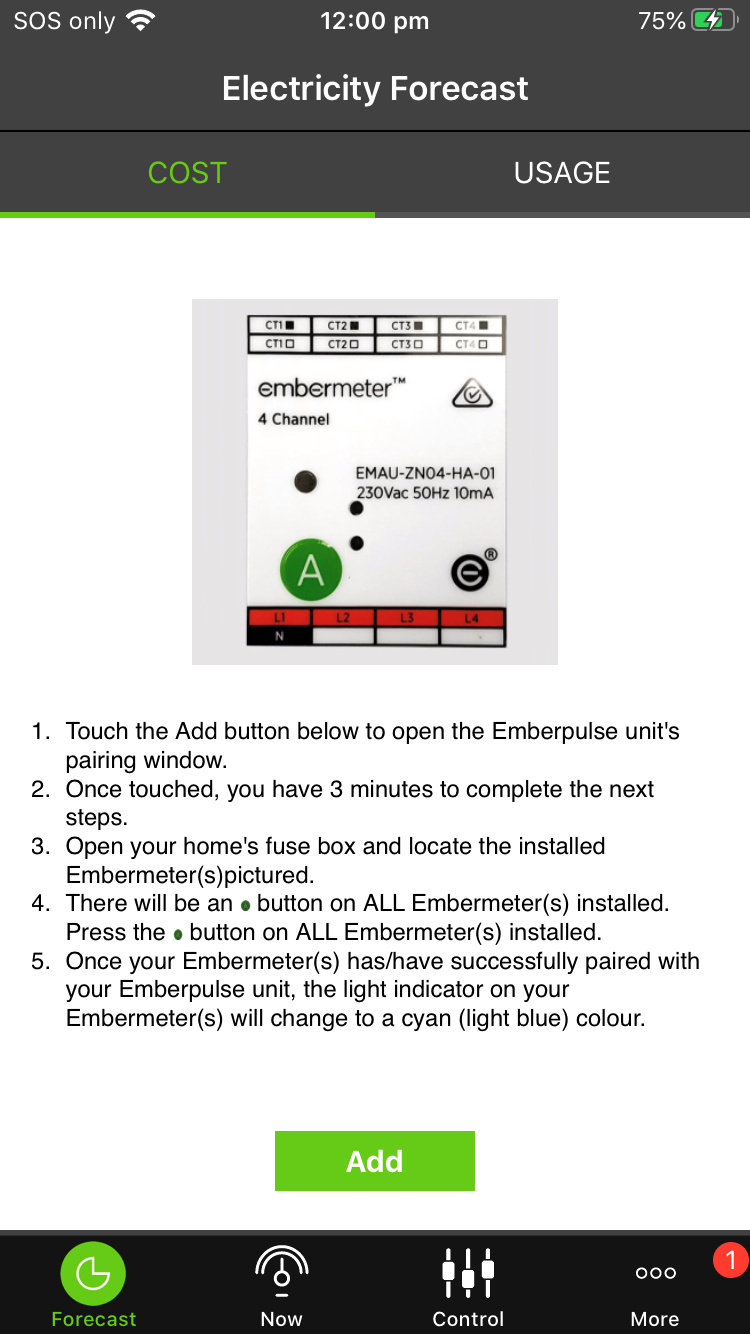 | - Note the image of the Embermeter displayed as this is what you will be looking for inside your meter box
- Read the instructions displayed
- Press Add to continue and then go outside to your meter box to connect your Embermeter(s)
|
Did you find it helpful?
Yes
No
Send feedback Sorry we couldn't be helpful. Help us improve this article with your feedback.